Display setup
Before you present, you’ll want to make sure that your displays are setup the way you want. Displays represent the devices or outputs where content will be presented.
To get started, confirm that your displays are configured correctly on your system. See the following articles for instructions on setting up multiple displays:
- Windows - set your display to “Extend”
- Ubuntu - set your display to “Join Displays”
- MacOS - set your display to “Extend”
NOTE: On MacOS you’ll also want to turn off “Displays have separate Spaces” system setting to remove the menu bar from the additional screen.
Provided your system is configured properly, display setup in Praisenter is handled from the Present tab on the left navigation. It’s the first place you see after selecting a workspace when starting Praisenter. On the Present tab, you can add and remove displays, name them, and more. To better understand displays setup in Praisenter, consider the following example:

In the example above, there are three displays - in this case three monitors, but they can be TVs, projectors, or any display device. Going left to right, the first display is the command display - the one where your operating system taskbar appears and where the Praisenter application runs. The right two displays are empty because we have configured our system to extend the desktop onto these displays. With a setup like this, Praisenter can be configured to send content to the right two displays.
NOTE: It’s recommended that you have at least two displays. Praisenter can present content on any number of displays, provided you have them configured properly and your hardware supports it. You only need one display if you plan to present to an NDI® output only.
NOTE: The configuration above, where the first display is the command display, is not required. You could have the command display in the middle or all the way to the right. In addition, the displays do not have to be the same size or resolution. In the next few sections you’ll see how to configure the displays in Praisenter.
Display controllers#
When Praisenter loads for the first time, it will detect how many displays are connected and attempt to determine the basic setup. Praisenter looks for at least one display that isn’t the command display. When found, the display will be used as the primary display. For example, in the screenshot below, Praisenter detected three displays. Because one of those displays (display 1) has the taskbar on it, and there’s more than one display, it designated display 1 the command display and hid it. Since displays 2 and 3 are available, Praisenter selects the next one in order of display number (display 2) as the primary display and shows a display controller for it.
NOTE: The command display is the display where the Praisenter application and other applications will be used and content will not be presented there. Think of this as your desktop from where you will control all other displays.
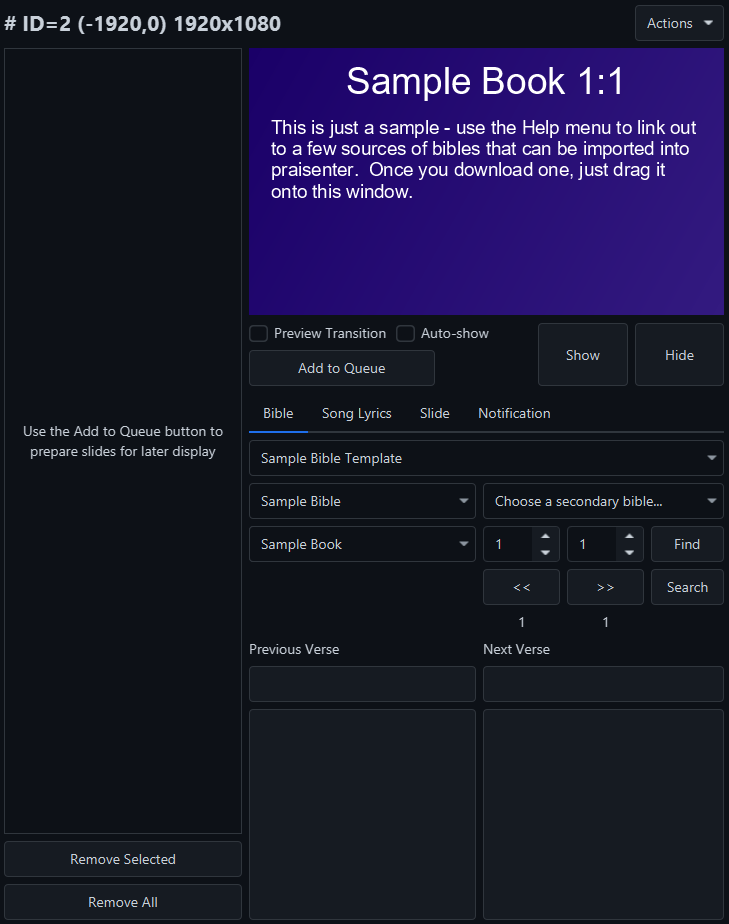
A display controller is the set of buttons, options, and commands that allow you to control the display it’s bound to. In the top-left corner of the display controller, you’ll see the name assigned to the display: # ID=2 (-1920,0) 1920x1080. The default naming convention is as follows:
ID=2- This display controller controls the second display.(-1920,0)- The display is positioned atx=-1920andy=0.1920x1080- The display has resolution ofwidth=1920andheight=1080.
There are many features on the display controller, but don’t get overwhelmed - we’ll cover all of them in the Presenting section of the manual. For now, let’s focus on adding, hiding, renaming, and other display management features.
NOTE: Praisenter monitors your system’s display configuration and will react to changes. When changes are detected, Praisenter may clear the content currently presented on that display.
NOTE: You can override the defaults that Praisenter applied and configure them manually.
Adding displays#
On create of a new workspace, or if you are starting Praisenter for the first time, Praisenter detects the available displays and selects one to be the primary display. You will need to add any additional displays you would like to present to. To add a display, use the Add Display button in the top right corner of the Present tab.

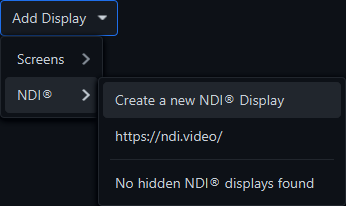
In the screenshot above, there are two types of displays that can be added: screens and NDI® outputs. NDI® outputs will be covered later in the manual. In this example, Praisenter detected three screens in total and determined that screen 1 should be the command display and screen 2 should be the primary display. Since screen 2 has already been selected, only screens 1 and 3 are available to add. To add screen 1 or screen 3, simply click on the option in the list. When a screen is added, a new display controller is created for the screen. In the example below, screen 3 has been added, and as a result, a new display controller has appeared with the name # ID=3 (1920,0) 1920x1080. We now have two display controllers, one for display 2 and one for display 3. We can control displays 2 and 3 independently, showing different content on each. This is nice if you have a display for a minister and a different display for the congregation.
NOTE: You can link displays if you want the same content to go to different displays. Another way to send the same content to two displays is to configure your system to have the displays mirrored instead of extended. Yet another way is to have one video output and physically split it into two outputs and running those cables to the two displays.
NOTE: When you are controlling multiple displays, you should consider maximizing the Praisenter window to avoid horizontal scrolling. Having an ultra-wide command display can be especially useful when you are controlling many displays.
Now that display 3 has been added, the Add Display button only shows display 1 (the command display). As mentioned earlier, you can control as many displays as your system can handle. You can also choose which display you’d like to be the primary display.

Identifying a display#
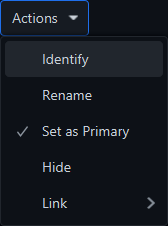
When configuring displays in Praisenter, it can be challenging to know which display corresponds to which output device. To make setup easier, Praisenter provides the ability to Identify the devices. Use the Actions -> Identify command on the display controller to identify it. Executing this command will show the display number on the output device for a few seconds.
NOTE: To identify all displays, you need to add them and identify each one.
NOTE: Praisenter will confirm that you want to perform the action before showing the number on the screen.
Naming a display#
Praisenter applies a default naming convention to all detected displays. The pattern is # ID=n (x,y) wxh where:
nis the display number.xis the display’s horizontal position relative to your other displays.yis the display’s vertical position relative to your other displays.wis the horizontal resolution of the display.his the vertical resolution of the display.
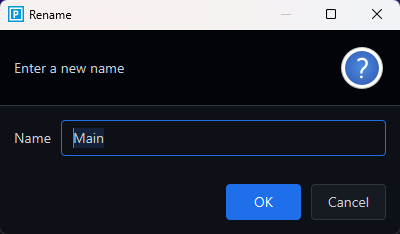
An example of a default name is # ID=2 (-1920,0) 1920x1080. While this naming helps with setup or identification, it may be less useful over time. To make it easier to quickly recognize and identify displays, Praisenter allows you to Rename your displays using the Actions -> Rename command on the display controller. For example, imagine you have three displays, the command display (a computer monitor), the primary display (a projector that displays to the church), and a small TV on the stage pointed towards the minister. You can rename the projector to “Main” and the TV to “Stage” to better identify which display you are presenting to.
NOTE: You can rename a display at any time.

Primary display#
The primary display is the one you present to most frequently. Marking a display as the primary allows Praisenter to choose the correct default width and height when creating slides. If your slides are built to the correct width and height, Praisenter won’t need to adjust them to match the display. If a slide uses different dimensions, Praisenter will perform adjustments called fitting before presenting the slide on the display.
The fitting process adjusts the slide’s width and height to match the displays dimensions. The fitting process will also adjust every slide component’s width, height, and position. The adjustments are as non-destructive as possible, but its possible you may see issues if the target display’s resolution is very different than the slide’s target size. To avoid fitting, select the target size to match the intended display when creating a slide.
Hiding a display#
In addition to adding displays, you can also hide them. Hiding means you don’t want to present anything on that display. This can be useful if Praisenter detected the wrong display and when you’re configuring the displays you want to use. Hiding a display does not remove it permanently - you can always add it back.
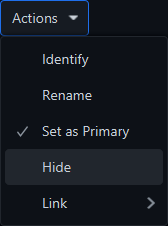
To hide a display, use the Actions -> Hide menu command.
NOTE: When you hide a display, anything currently presenting on the display will be cleared.
Linking displays#
Praisenter creates a display controller for every display you choose to present to. This lets you control the displays independently - for instance, you could show a Bible verse showing on one display and a Song on another. That flexiblity is great, but it can be hard to manage if you want two displays to show the same content. This is where linking displays can help. Linking one display to another allows you to control both displays with a single display controller.
To link to displays, use the Actions -> Link command.
NOTE: You can unlink the displays by performing the same steps.
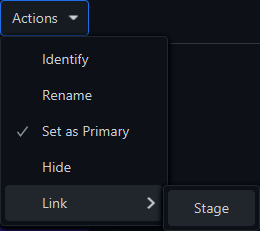
You link a display from the display controller you want to use to control both displays. For example, in the screenshot below, display 2 has been used to link display 3. Now, the display controller for display 2 controls both display 2 and display 3.
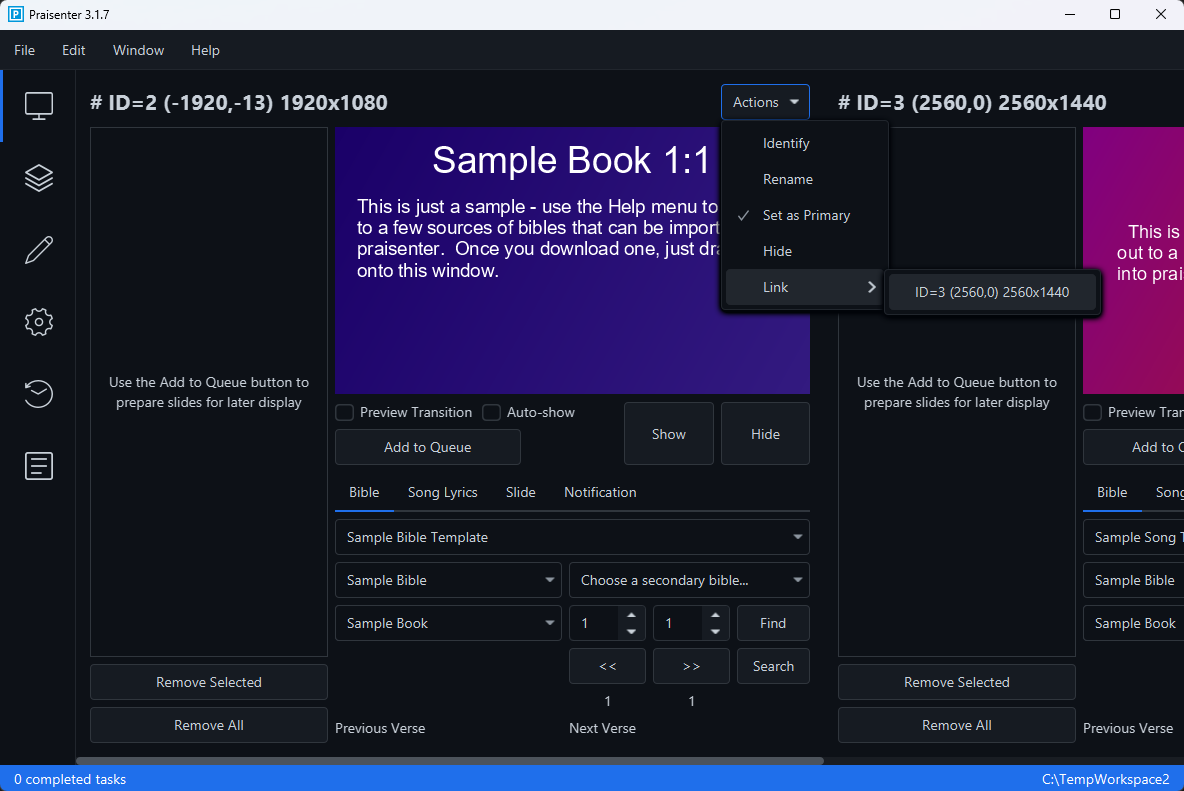
Even after a display has been linked, you’ll notice that the display controller for the linked display (display 3 in the screenshot below) is still visible and enabled. This allows you to send content from one display controller (display 2) to both displays, but also manually control the content on the linked display (display 3). For example, if you have display A controlling display B, when you send a slide from display A’s controller, it will present on both display A and display B. Now, if you send a slide from display B’s controller, it will only go to display B and replace the previous content sent from display A. If you send another slide from display A, it will again send to both display A and display B and replace the content on both displays.
Some points to keep in mind when linking displays:
- One display can link to multiple displays - For example, a configuration like
display Acontrols bothdisplay Banddisplay Cis supported. - A hierarchy of multiple displays cannot be created - For example, a configuration like
display Acontrolsdisplay Banddisplay Bcontrolsdisplay Cis not supported. - Multiple displays cannot be linked to the same display - For example, a configuration like
display Acontrolsdisplay BANDdisplay Ccontrolsdisplay Bis not supported.
Adding an NDI® display#
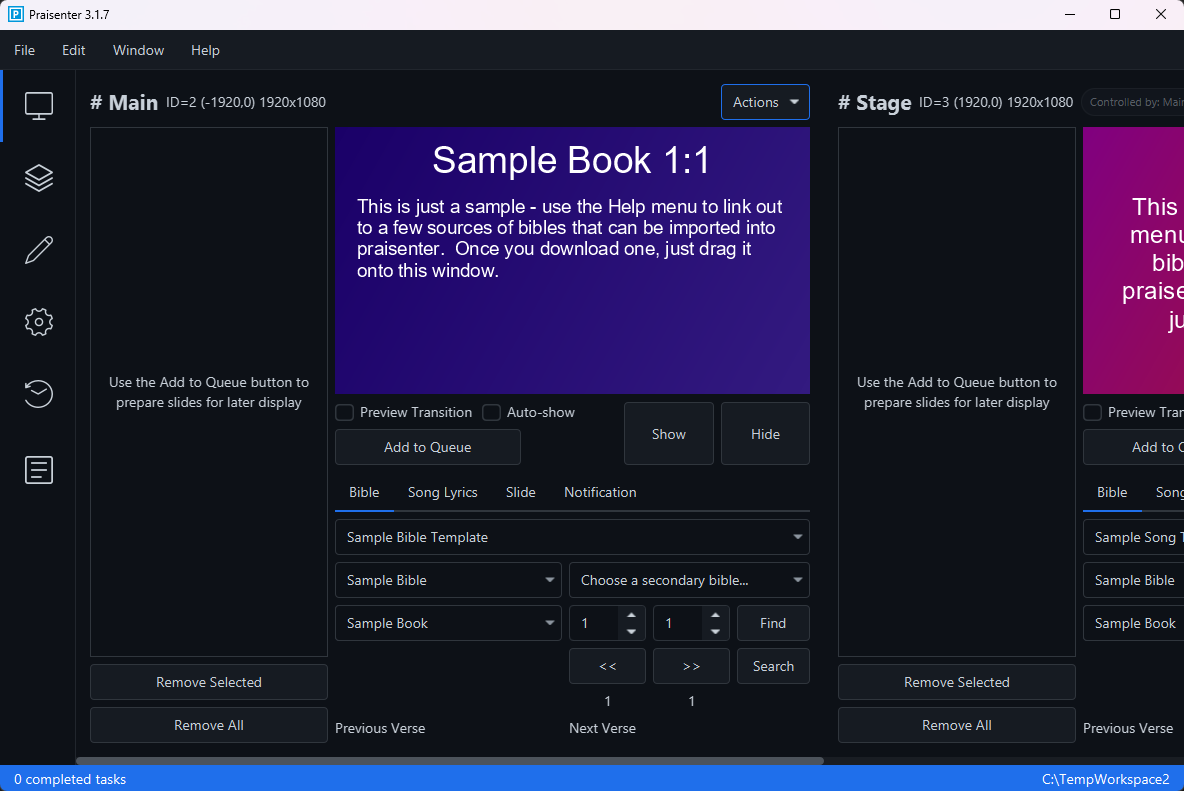
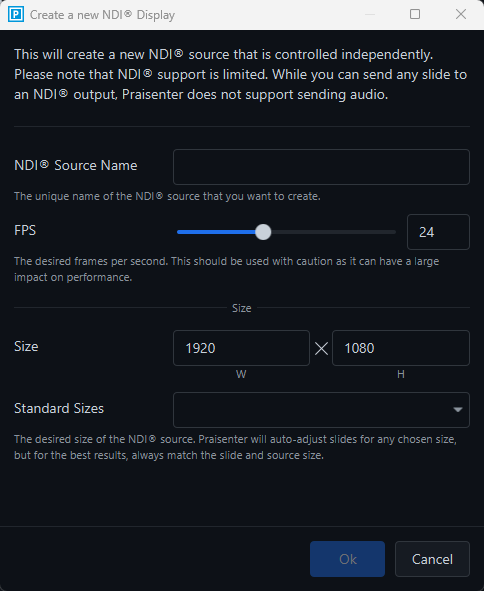
NDI®, short for Network Device Interface, is a software standard for transmitting video and audio over an IP network. Creating an NDI® output is useful when using another application, like OBS, to combine, overlay, and merge content coming from many sources. For instance - you may have a live video feed coming from a camera that you’d like to overlay with some content from Praisenter. To create an NDI® display in Praisenter, use the Add display -> NDI® -> Create a new NDI® display command.
NOTE: NDI® is a registered trademark of Vizrt NDI AB
When adding an NDI® display, you must specify a few details:
NDI® Source Name- This will be used by other programs to locate your display and connect to it.FPS- The number of frames per second that Praisenter will send to the NDI® display.Size- The desired width and height for the display.
NOTE: Each NDI® display should have a unique name to be identifiable by other applications.
NOTE - The
FPSoption can significantly impact system performance. In most cases,24FPS is the lowest value that still yields smooth output. Praisenter will attempt to improve performance during presentation when certain conditions are met (no video, no animation, no timed slide components, etc.).
NDI® displays can be linked and hidden just like physical displays, but they can also be deleted. Deleting an NDI® display will clear the content and remove the display from the network.