Quick start
Welcome to the Quick Start Guide! Here, we’ll walk through the steps to get you up and running quickly. For more detailed information, you’ll find links to other sections of the manual.
After following this guide, you should have Praisenter installed, displays configured, a Bible imported, and a slide presented. There’s a lot more you can do with Praisenter, so feel free to explore additional features!
1. System configuration#
Before you start Praisenter, make sure your displays are properly configured. Connect all your devices (monitors, projectors, TVs, etc.) to your computer and set your display mode to Extend so you can move windows between them. For more details, see the Display setup section of the manual.
Once your displays are connected and you can drag applications between them, move on to the next step.
NOTE: You don’t have to finish your system setup before starting. Praisenter will detect when displays are added, removed, or changed. However, having everything configured ahead of time allows Praisenter to auto-configure your displays, which speeds up the quick start process.
2. Install Praisenter#
There are two way to install Praisenter: Download from the store or install manually. The recommended way is to download from the store.
NOTE: Praisenter is released on the Microsoft and Snap Stores, but don’t worry, it’s free.
For Windows:
![]()
For Ubuntu:
![]()
For macOS
Praisenter is available on the Windows, Snap, and macOS App Stores. Using the app store is the safest way to ensure you get an official version of Praisenter. Praisenter can also be downloaded as an MSI or DEB from the project site under the Releases section, but these builds require more steps to install properly. If you need help with manual install steps, see this article.
NOTE: Praisenter is open source, so if none of the options above work for you, you can always try building Praisenter yourself by cloning the GitHub repo.
Once installation is complete, launch Praisenter and continue to the next step.
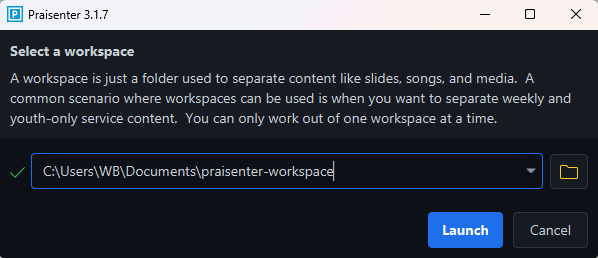
3. Create a workspace#
Every time you start Praisenter, you’ll be prompted to create a workspace. A workspace is simply a folder on your computer that Praisenter uses to store its settings, Bibles, song lyrics, videos, and other content. You can have multiple workspaces on one computer and switch between them.
To continue, create a new folder, and select it as the workspace. Then click Launch.
4. Setup displays#
After selecting a workspace, the first screen you’ll see is the Present tab where you can control your configured displays. Each display is assigned a display controller, allowing you to control them independently. In the example below, Praisenter detected 3 displays and automatically created a display controller for display #2 (named # ID=2 (-1920,0) 1920x1080). If you’re not sure which display corresponds to which controller, use the identify displays feature.
By default, Praisenter will choose one display as the primary display, but you can add more or change the primary at any time.
Once you have at least one display controller ready, proceed to the next step.

5. Import a Bible#
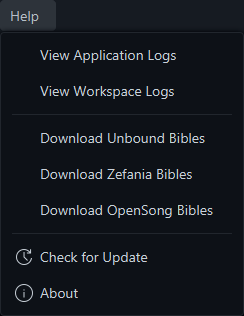
Next, download a Bible from one of the supported sources and import it into Praisenter. You can download as many as you need and import them all at one time. The easiest way is to download an Unbound Bible by using the Help -> Download Unbound Bibles menu option.
Once your downloads are complete, drag-and-drop the files into the Praisenter window or use the File -> Import menu. When the import finishes, continue to the next step.
NOTE: You can skip this step if you don’t plan to use Praisenter for displaying Bible verses.
NOTE: If you can’t find the version or translation you are looking for, you can use the Bible editor to create a new one. Within the editor, use the bulk edit feature to quickly enter entire chapters or books.
6. Create slides#
Now create a slide by going to the File menu and selecting New Slide. From there, you can add placeholders, media, and other content.
Be sure to Save your slide, then continue to the next step.
NOTE: If you’re in a hurry, you can skip this step by using the sample slides provided.
7. Present slides#
With your displays configured, Bible(s) imported, and slides created, you’re ready to present. Go back to the Present tab. On the Bible tab select a slide template.

Then pick the Bible you imported earlier (or the sample Bible if you skipped the import). Click the Find button to locate the verse and update the Slide Preview.

Click the Show button to show the slide on the display. Finally, use the Hide button to clear the slide from the display.