Presenting
Presenting is how you show content on a screen, projector, TV, etc., and manage that content over the duration of a service.
All presentation control is handled from the Present tab on the left navigation. It’s the first place you will see after selecting a workspace. From here, you can control everything related to presenting - displays, queues, and more. Each display you have configured is assigned it’s own display controller where you can control the content shown on that display. In this section of the manual, we’ll dive into each part of the display controller.
Slide preview#
Each display controller has a slide preview: the rectangle at the top of the controller that shows a slide before you present it. The preview will update based on your actions in the display controller. You must have a preview before you can show anything.
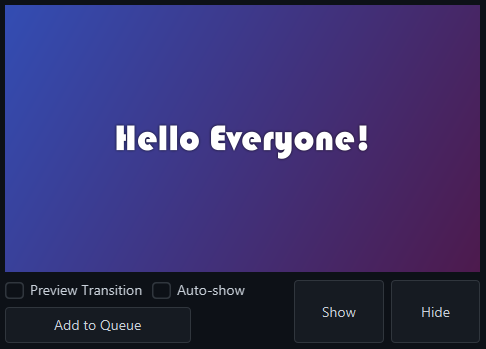
Show / hide#
Beneath the slide preview are two large buttons: Show and Hide. These are your main controls for sending contact to - or clearing content from - the attached display. As mentioned above, you must have a slide preview before you can send content.
When you click Show, Praisenter takes the slide from the preview, uses its transition, and displays it. There are a few details to keep in mind:
- If a slide is already displayed, it will be transitioned away using the transition of the new slide.
- If the currently displayed slide and the new slide are the same, Praisenter will transition only the placeholder content, while the background and static elements (such as images or videos) remain unchanged. This behavior can be modifed in the settings.
- If a slide is in the middle of transitioning in and you click
Showagain, Praisenter cancel the current transition and begin the new slide transition immediately. This can also be changed in the settings.
The usual workflow is:
- Choose the type of content you want to show by clicking one of the tabs:
Bibles,Song Lyrics,Slides, orNotifications(more on these later). - Use the controls in the tab to preview a slide.
- Click
Show.
The Hide button is used to clear any content currently being displayed. When you click Hide, Praisenter will use the transition of the currently displayed slide to animated it out. Clicking Hide when nothing is displayed has no effect.
Preview Transition#
The Preview Transition toggle lets you preview the slide’s transition before sending the slide to the display. If the slide has no transition defined, then the preview shows the slide as if this setting was disabled. This is useful to observe the behavior when transitioning between two slides with the same or different content.
Auto-show#
The auto-show toggle enables the automatic display of slides to the display. This is particularly useful when presenting Bible verses and song lyrics: instead of manually previewing each verse and clicking Show, you only need to press the the >> (next) button and it will auto-show onto the display.
NOTE: This feature can be a bit tricky until you get used to it - experiment with it outside of live service.
Add to queue#
The Add to Queue button (covered in detail in the Queue Management section) allows you to save the previewed slide for later display. This is useful when preparing for a service where you are showing a few different songs during worship, Bible verses during the lesson, and slides during intermissions. Having the slides saved in the queue lets you call up a specific slide quickly. For example, you might search in the Song Lyrics tab for a song, click on a section to preview it, then click Add to Queue to save it for later.
Presenting Bible verses#
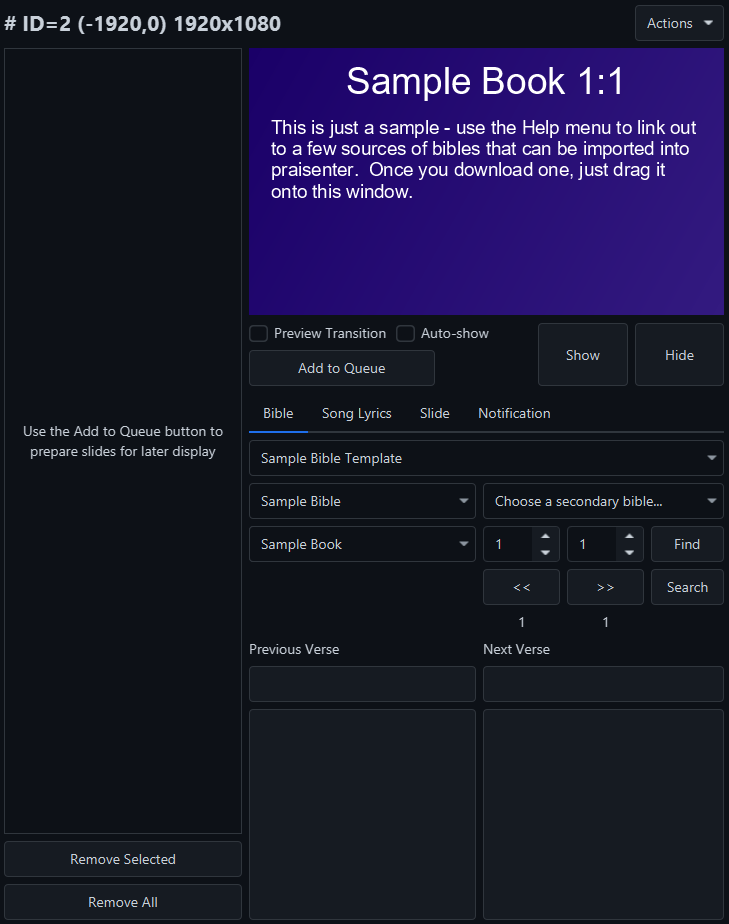
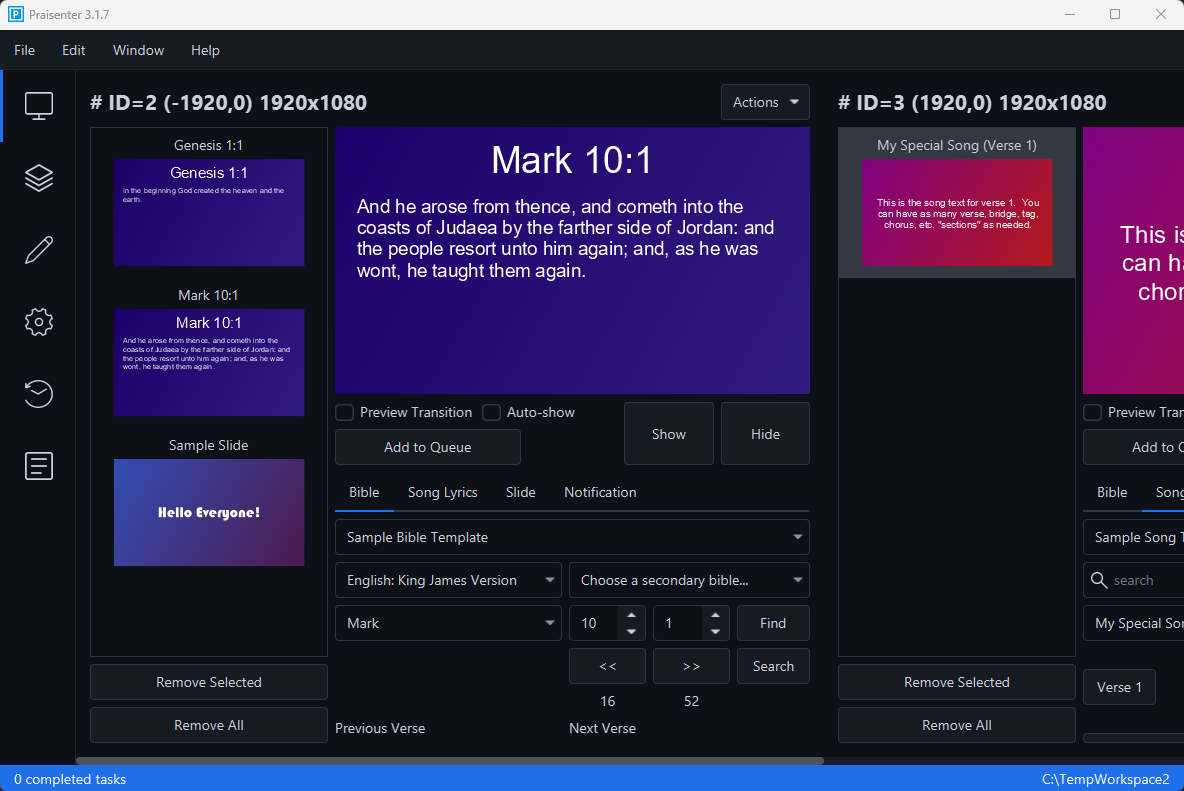
Presenting Bible verses is controlled from the Bible tab in the display controller.

Presenting Bible verses requires you to select a slide template first (remember a slide template is just a slide with placeholder) components.

After selecting a template, the preview box will display the first verse of the selected Bible. Praisenter supports selecting a primary and a secondary Bible. The primary Bible is used for searching and navigation while the secondary Bible can be used to display two versions/translations simultaneously - provided the selected template has the proper placeholders configured.

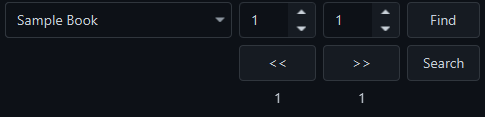
After selecting a primary Bible, you can jump directly to a verse using the book, chapter, and verse inputs and clicking the Find button. Alternatively, use the << (previous) and >> (next) buttons to navigate to the previous and next verse. The numbers displayed under the << (previous) and >> (next) buttons indicate the number of chapters in the selected book and the number of verses in the selected chapter (respectively). You may also use the Search button to search within the primary Bible.
NOTE: If you hold down the Ctrl or Command key while using the
>>(next) button, Praisenter will append the verses to the slide instead of replacing it - allowing you to display multiple verses on one slide.
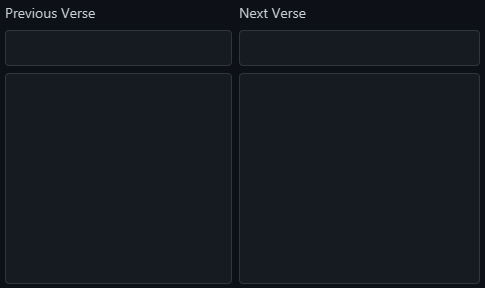
As you navigate through a Bible, the Previous verse and Next verse boxes reflect the previous and next verse of the current verse.
Presenting song lyrics#
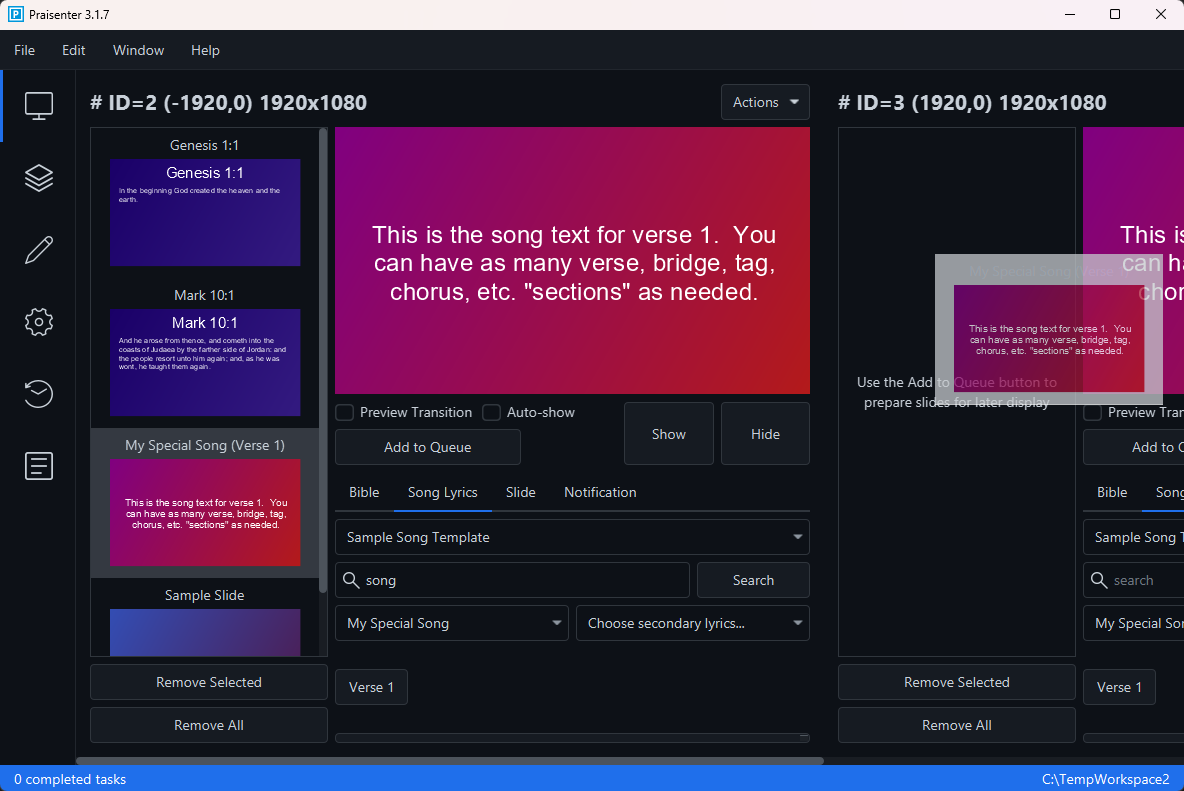
Presenting song lyrics is controlled from the Song Lyrics tab in the display controller.

To present song lyrics, first choose a slide template (remember, a slide template is just a slide with placeholders).

Then, search for the song you want to display by typing in a part of the song, the song title, or a matching keyword.

Once you find the song, the primary lyrics are selected automatically. Optionally, you can select a secondary set of lyrics to show two different languages side-by-side - provided the selected template has the proper placeholders configured. In the example below, it selected the “My Special Song” lyrics.
NOTE: Keep in mind that a song in Praisenter contains multiple sets of song lyrics in the same document.

Once the primary lyrics are selected, the song’s sections appear below as buttons. In the screenshot below, our sample song only has one section called Verse 1. A button appears for each section in the song. Clicking a section updates the slide preview with that section’s content.

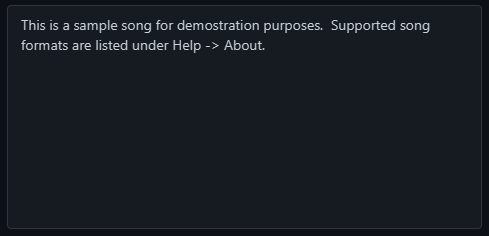
At the bottom, song comments appear. These may include helpful notes such as section order, presentation instructions, or signal details.
Presenting slides#
Presenting slides happens on the Slides tab in the display controller. Only slides without placeholders will show here.

When you click the Slides tab, the list of available slides appears.

If you have many slides, use the search feature to find the slide by name or tag.

Click a slide to preview it.
Presenting notifications#
Notifications provide quick alerts that overlay on top of whatever content is currently displaying — for example, reminders or announcements meant to draw attention.

Start by selecting a slide template.
NOTE: The template selected must have a placeholder component configured with
Type=TextandVariant=Primary.

Then enter the text you want to display for the notification.

Since notifications overlay existing content, they do not use the standard Show and Hide buttons. Instead, use the controls located below the notification text field.

Queue Management#
Whenever there is a slide in the preview, you can save that slide to the queue using the Add to Queue button. Each display controller has its own queue, allowing you to prepare content independently for each display. A common use case is queuing song lyrics for one display and sermon notes for another.
NOTE: See the Add to queue section of the manual for more details.
You can queue as many slides as you need - but too many may make switching difficult. To reduce the number of slides added to the queue, only add the first. For example, imagine you need to present the Bible verses Matthew 1:3-10. Instead of adding one slide for each verse, only add a slide for the first verse. Then, when you click that queued slide, the display controller will switch to the Bible tab, set the selected Bible/book/chapter/verse, and update the preview. To show verse 4, click the >> (next) button, then the Show button. This applies to song lyrics as well. Add a slide for one of the sections in the song and Praisenter will switch the display controller to the Song Lyrics tab, set the selected song, and show the section buttons for you.
NOTE: The queue associated with each display controller is saved when you close the application - but there’s currently no separate feature for saving and re-loading queues or slide shows for reuse.
NOTE: Praisenter does not support auto-playing the slides in the queue. To advance through the queue, you must manually click on each slide and then click
Show.
NOTE: Once a slide has been queued, you can use the context menu (right-click or control-click) to create a new slide from that queued slide. This feature allows you to save the slide exactly as it is - with any templated text, size adjustments, etc. A slide created this way is not a template, but will retain any templated text. This can be useful when you want to adjust a templated slide manually or use text from a song or Bible verse.
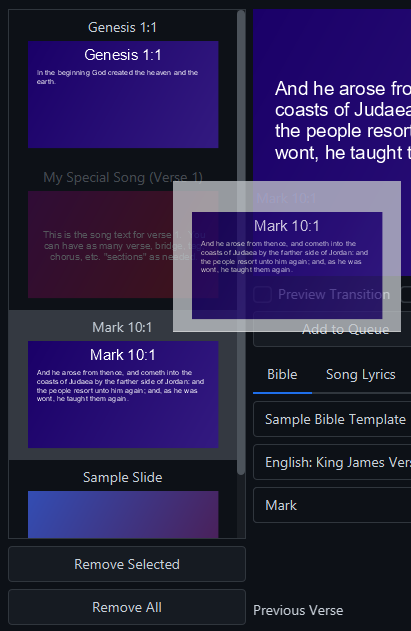
If you add slides in the wrong order, you can reorder them by clicking and dragging slides into the desired sequence. In the example below, slide 3 is being moved above slide 2.
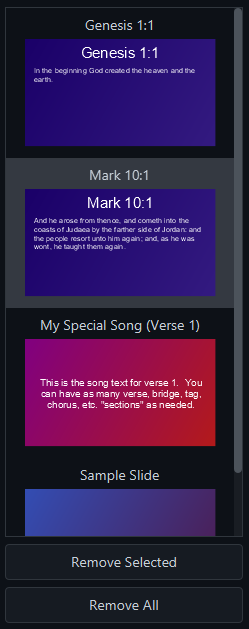
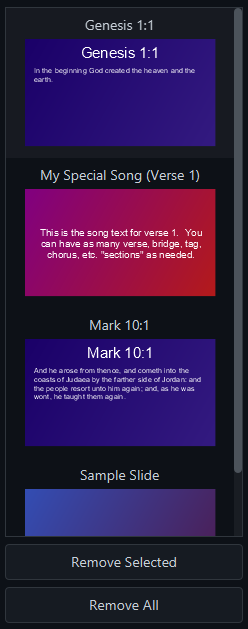
You can remove slides from the queue using the Delete key, the context menu Delete command, or the Remove Selected and Remove All buttons.
To duplicate a slide, use the copy & paste hotkeys, the context menu Copy and Paste commands, or hold down the Ctrl or Command key while dragging a slide. You can also copy, paste and move slides between display controllers.
Bible searching#
Praisenter offers a flexible Bible-searching feature to help you quickly find verses. Click the Search button to open the search tool. The tool includes filtering options, a results view, and a detail view for selected results. The filtering and search controls are at the top, search results on the left, and the detailed verse view on the right.
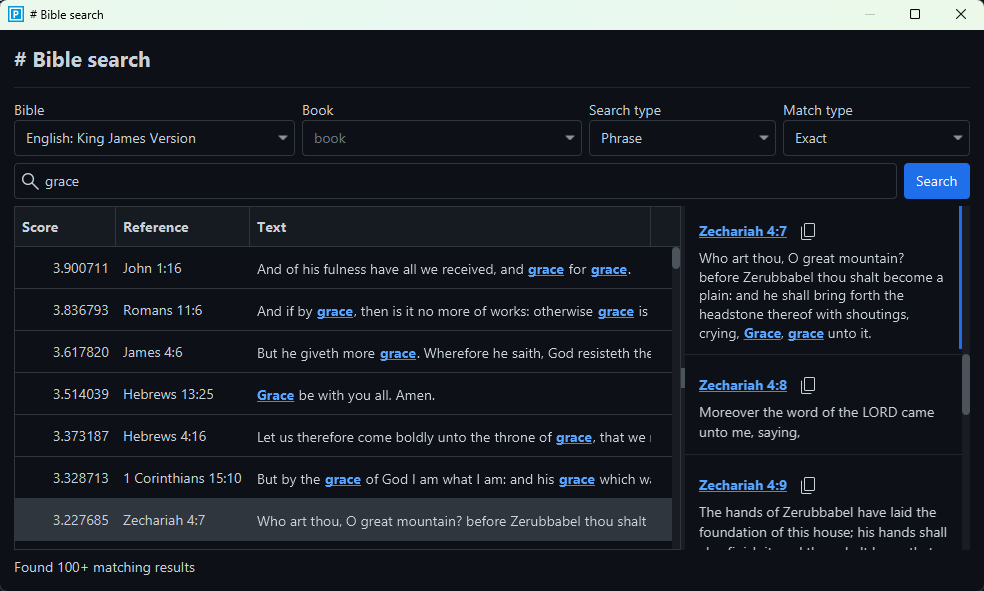
When you perform a search, up to 100 matches will be shown. If there are more than 100, the interface will display the message Found 100+ matching results in the bottom-left corner. At that point, you should refine your search. In the results list, the words or phrases that matched your search will be highlighted. In the example above, we searched for “grace” and each verse that matches has the word “grace” underlined and in blue. The currently selected result (the last result in the screenshot above) doesn’t show the matched word in the list view because it appears further in the verse. When you click on a result, the detail pane on the right will show the full chapter and scrolls to the selected verse - signified by the blue line on the right.
The search results include three columns: Score, Reference, and Text. The Score is a relevance metric, used to surface the most relevant results first. For example, a verse that matches your search terms more than once (or where the matches are close together) will typically score higher. Once you find the verse you’re looking for, you can double-click the row in the results list or click the reference on the right to select it. The copy icon next to the reference will copy both the verse reference and its text to the clipboard.
NOTE: You can append multiple verses by holding down the Ctrl or Command key when double clicking a result or clicking a reference.
The search tool searches one Bible at a time. Optionally, you can restrict the search to a single book. You can also select among different search modes: Search type and Match type. By default, the search is set to Phrase + Exact match. Below are the available options and how they work:
Search Types:
Phrase- Matches all given words in the order provided.All words- Matches all the given words, but order doesn’t matter.Any words- Matches any of the given words.
Match Types:
Exact- Matches words exactly as provided.Fuzzy- Matches words approximately and ranks results by closeness.
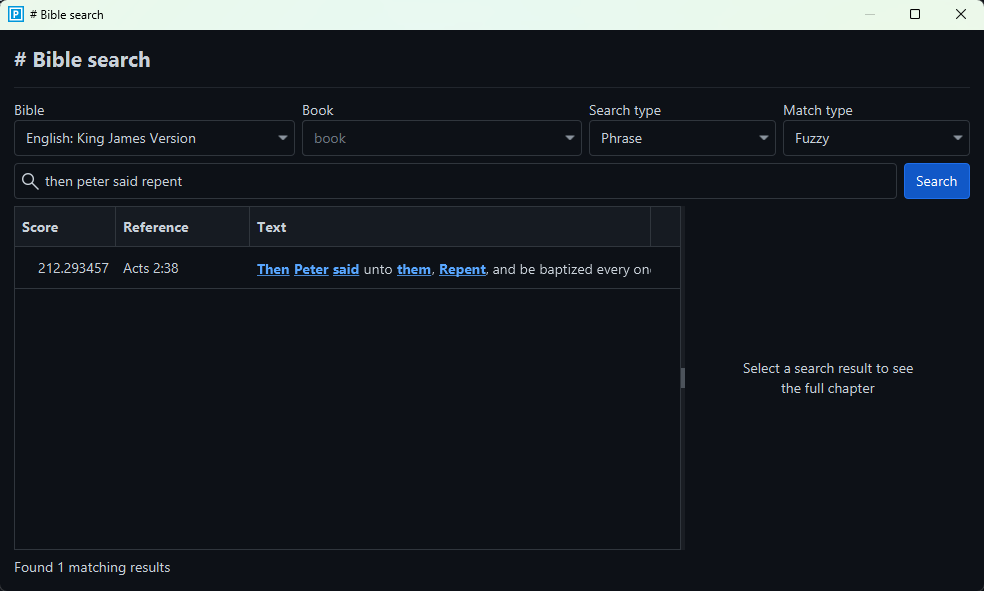
Fuzzy matching is useful when you don’t remember the exact phrasing or spelling. When you use a Fuzzy + Phrase search, Praisenter uses the score to rank results by how closely they match your input. For example, searching for “then peter said repent” returned the correct verse even though two words were omitted.
NOTE: For faster and more precise results, start with
Exact+All wordsbefore switching toFuzzy. Usually you’ll know some key words, and that yields better results. UseFuzzyonly when exact searching fails.
NOTE: To improve
Fuzzysearch results, try using uncommon or longer words rather than short or very common words - common words tend to skew results because of their frequency. For instance, in the example below, the word “then” was matched (even though the search word was “them”), underscoring how fuzzy matching can sometimes prioritize frequency over intent.
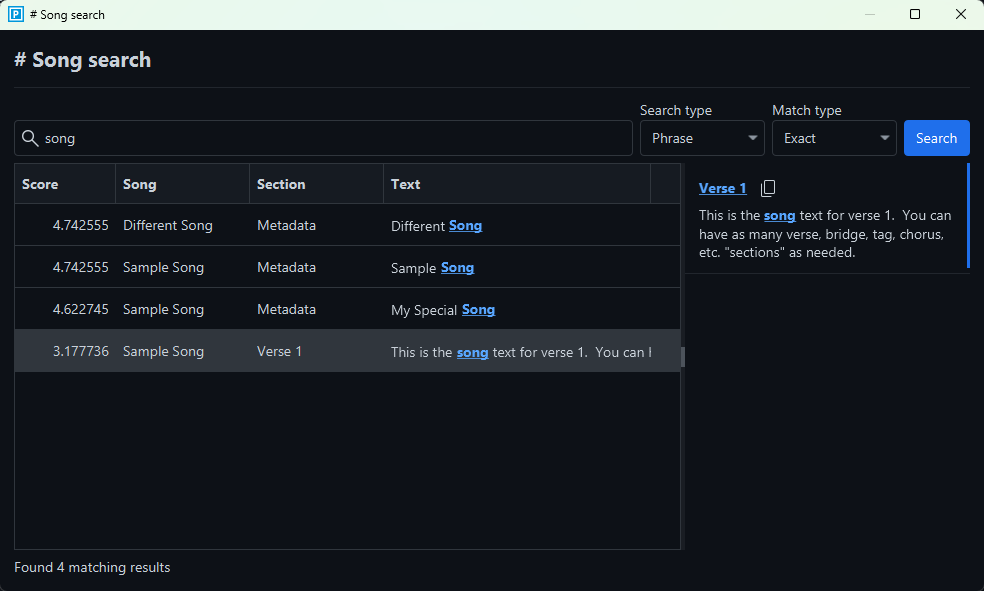
Song searching#
Song searching works much like Bible searching; see the section above for general search behavior. This section highlights the differences.
In addition to searching the lyrics themselves, Praisenter can also search song names, titles, keywords, and more. If a match is found in any of those fields, the Section column in the results will show the word Metadata, indicating the match was something other than the lyrics.
Selecting a search result behaves differently depending on what was matched. For instance, if the match was in the song title (metadata) and you double-click the result, Praisenter will set the song and lyrics options and list the song’s sections - but it won’t update the slide preview. Praisenter doesn’t know what section to preview since the match was on metadata. If the search result matches a section (not metadata) and you double-click it, Praisenter will set the song and lyrics options, list the sections, and update the preview with that section’s content. Alternatively, clicking a section name on the right will update the preview regardless of how you found the song.
NOTE: Unlike Bible searching, song searching does not support appending multiple lyrics by holding the Ctrl or Command key.