Slide basics
Slides are the backbone of displaying content in Praisenter - you can’t present anything without a slide.
Slides are canvases where you can add content like Bible verses, song lyrics and media. There are two types of slides in Praisenter: slides and slide templates. Slides behave much like they do in other presentation tools - you can place text, images, videos and format the styling. Slide templates have all the same features as slides, but allow for placeholder text. The placeholders are replaced on-the-fly when you are presenting.
NOTE: Praisenter does not support import of slides from other applications at this time.
A slide consists of the slide itself and zero or more components. Components are blocks of text, images, or video. Slides and components share certain properties (backgrounds for example), but components additional customizability based on the content. For example, a text component can have it’s font and text color adjusted, whereas a media component can be color adjusted.
In the sections that follow, the manual will introduce basic building blocks of slide editing. Beginning with opacity and color selection, then continuing with things like backrounds and borders and ending with font selection and padding.
A slide has several properites you can configure:
Name- The name of the slide. This is for reference in the library.Time- The duration the slide will show when added to a slide show. Not currently used.Opacity- Controls the transparency of the slide and all components.Size- The target size of the slide - use this to ensure the slide appears exactly they way you want.Standard size- An easier way to set the size.
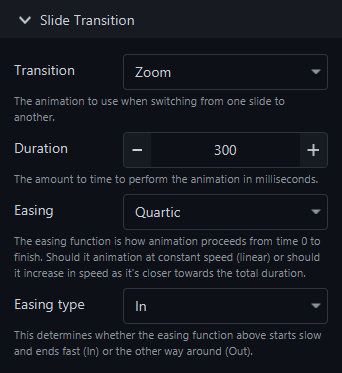
Another important slide property is the Transition. The transition defines the animation (if any) that should be used when changing from one slide to another. Praisenter supports a variety of transitions and allows you to change their direction, orientation, duration, easing, and more. The best way to learn how all these different properties work is to try them out!
Opacity / transparency#
Opacity is the measure of how transparent something is. Here’s a good way to think of opacity:
- A wall in your house has an opacity of 100%, it’s completely opaque.
- A window in your house has an opacity of 0%, it’s completely transparent.
- A tinted window on your car has an opacity somewhere between 0% and 100%.
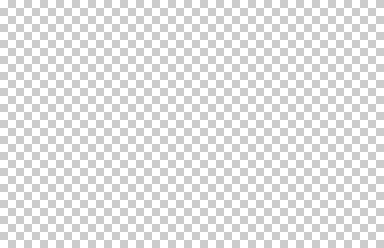
You can use opacity to blend components, media, and colors. When an element is fully or partially transparent, you might see something like the following. This checkerboard pattern of grey and white squares indicates that the element is partially or completely transparent.
NOTE: Praisenter allows you to create slides that are transparent. The content on the slide will blend with whatever is in the background - whether that’s a desktop background, another application, a video playing, or something else.
Colors#
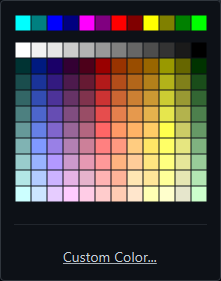
Many properties of slides and components involve choosing a color - backgrounds, text, borders, and more. Color is a fundamental aspect of slide editing, so knowing how to select a color is important. When you choose a color, Praisenter presents a default palatte of colors to pick from. Simply click on the color you want to use from the palette.
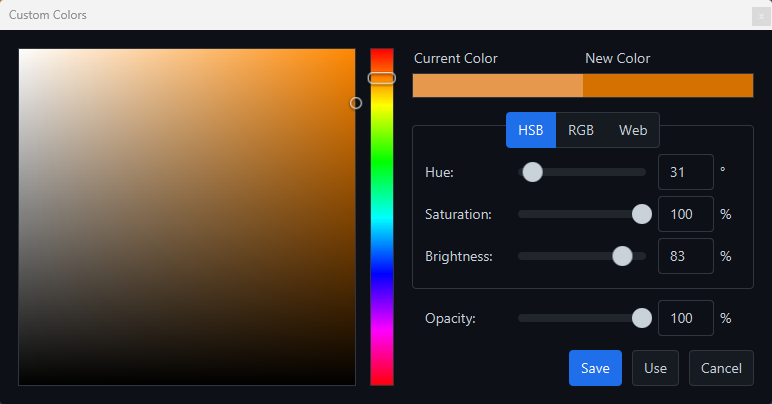
You aren’t limited to the colors in the default palette. Click the Custom Color link to open the custom color dialog. From here, you can create your own color in HSB, RGB, or Web mode. You can also specify the opacity of the color. Use the mouse to click and drag the circle around in the large square (on the left) to choose the saturation and brightness. Drag the vertical slider to change the hue.
Gradients#
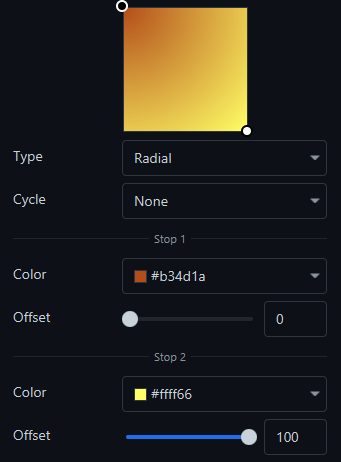
A gradient is type of coloring that uses two or more colors blended together. Praisenter supports two-stop linear or radial gradients. When configuring a gradient, you can specify the position of the color stops by clicking and dragging the circles in the preview square.
The Cycle option defines how the gradient repeats. To have the gradient repeat, move one of the circles in the preview square.
The Offset sliders determine how long to use 100% of the color of the stop before starting to blend.
Media#
Media is a general term used in Praisenter encompassing images, pictures, audio, and video. To use media on a slide, you must import it first. You can import media by drag-n-dropping files onto the Praisenter application, or use the File -> Import menu command. Some media types (audio and video) may be converted to a supported format during import. Because importing media can take time, you can monitor the progress of imports in the status bar at the bottom of the application or on the Tasks tab.
When you add media to a slide, additional settings become available depending on the media type:
| Option | Image | Audio | Video | Notes |
|---|---|---|---|---|
Tile image |
✓ | Repeat the image to fill the entire space | ||
Scaling |
✓ | ✓ | None (leave size unchanged), stretch, or keep aspect ratio | |
Adjust color |
✓ | ✓ | Adjust the color of the content | |
Loop? |
✓ | ✓ | Whether to restart the media when it finishes playing | |
Mute? |
✓ | ✓ | Whether to mute the audio |
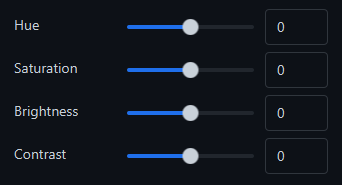
Media - color adjust Color adjustment is available for both images and video. This feature lets you to modify the color, brightness, and contrast of an image or video. Found the perfect asset, but you want it green instead of purple? No need to adjust the asset in an editor, just use the color adjust feature.
Backgrounds / borders#
Both a slide and each of its components support backgrounds. Backgrounds are rendered underneath the content. A background can be None (transparent), a Color, a Gradient, an Image, or a Video. Slides and components are limited to a single background each.
NOTE: There’s a special behavior when it comes to the slide background and slide templates. When using a slide template to display songs or Bible verses, Praisenter will use the slide transition to animate slide components, but will NOT animate the slide background. This is especially important for video backgrounds to ensure the video is not restarted. Configure the background of the slide to be
Mediainstead of adding a media component.
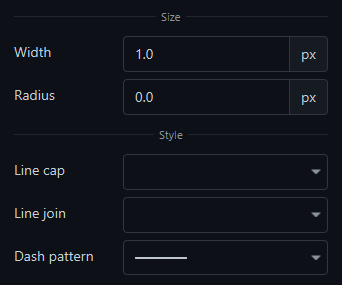
Borders trace the edge of an element and have width, style, and radius properties. Borders are available on slides, slide components, and text. Borders can be None (no borders), a Color, or a Gradient. Along with width, style, and radius, you can configure the following properties of the border:
Line cap- The style of the border when the border ends.Line join- The style of the border when the border turns.Dash pattern- The style of the border lines themselves. This will scale with the border width.
Shadow / glow#
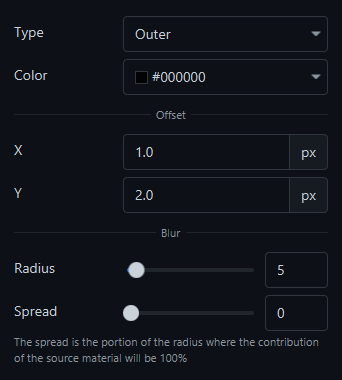
Shadow and glow are variations of the same concept - both apply a color that fades outward from an element to transparency. Shadow and glow can create an illusion of depth or texture. When you enable shadow or glow, you can customize the following properties to produce the effect you are looking for.
NOTE: Only slide components and text support shadow and glow.
Type- Choose between an inner or outer shadow/glow.XandYoffsets - How far from center the effect is positioned.Radius- How far the effect extends from the element.Spread- How much of the radius will be 100% of the chosen color.
Font / fill / padding#
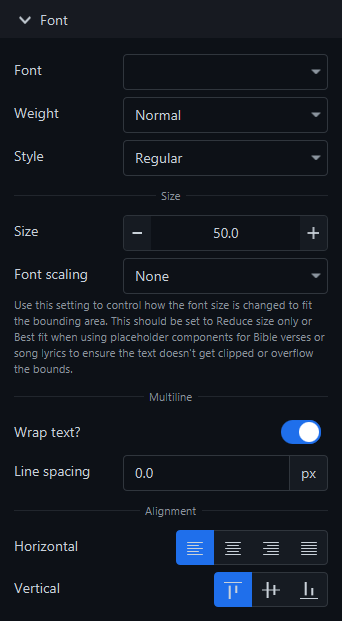
Font formatting in Praisenter should feel familiar if you used other word-processing applications before. You can choose any font installed on your system. You can specify the font weight - such as normal or bold - and the style: either normal or italic.
NOTE: Not all font weights and styles are supported by every font; its possible that selecting a weight or style will have no visible effect.
The font size is measured in points, and you can increase or decrease it as needed. The minimum font size is 0. In addition to choosing the font size, you can use the Font scaling property to further control the font size:
None- Use the font size chosen only. If the text exceeds the bounds of the component, do nothing.Reduce size only- Start with the chosen font size, but reduce it if the text overflows the component’s bounds.Best fit- Use the font size chosen as a baseline and increase or decrease the font size to fill the component’s bounds.
This capability is especially useful for placedholder components where the length of the text being displayed will change. For example, some Bible verses are long and some are short, so picking the desired font size and setting the Font scaling property to Reduce size only will ensure all verses fit on the slide.
NOTE: Currently, all text formatting (font, style, size, color, etc.) applies to the entire component - there is no option to style parts of the text differently.
For text to be visible, it must be filled or colored. In Praisenter, you can color text using a color or a gradient.
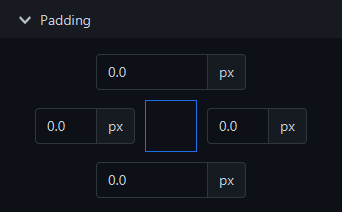
Finally, you can adjust the padding around text. When you create a component that supports text, the text will fill the width and height of the rectangular bounds. This may not produce the desired effect when you have a background, borders, or shadow/glow effects. The padding, or empty space, between the edge of the component and the text can be specified for each edge: top, right, bottom, and left.